
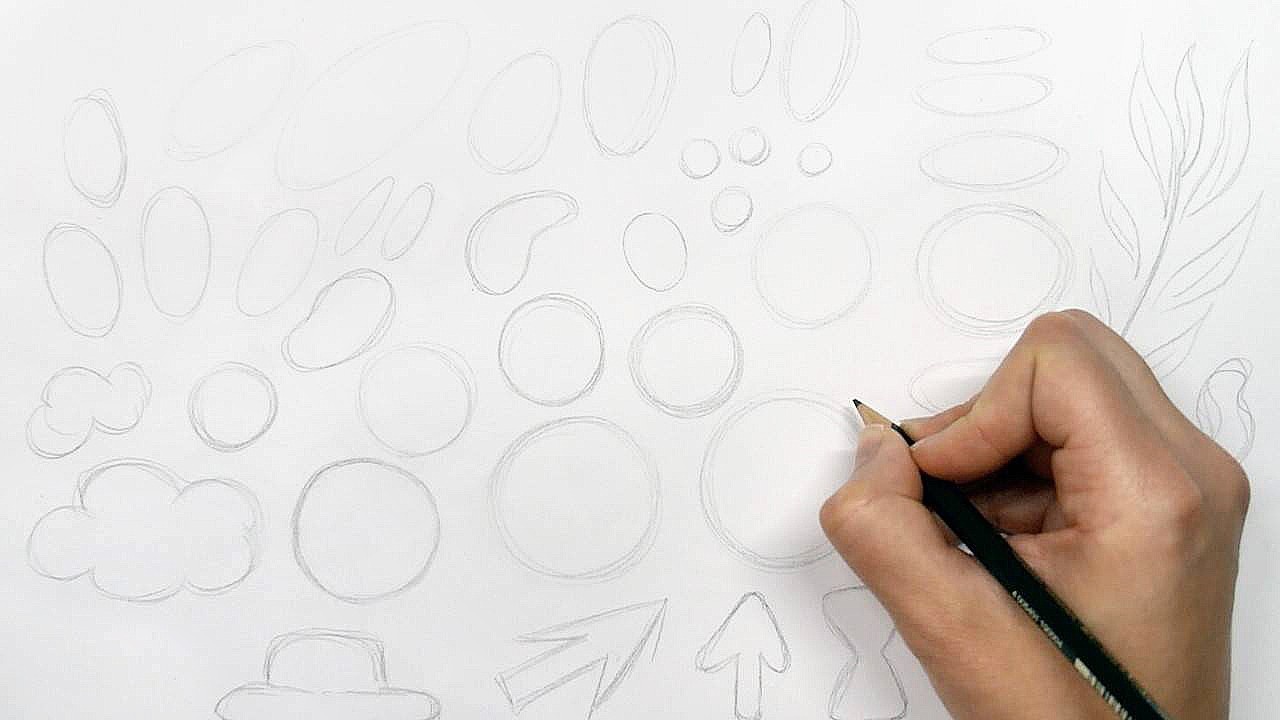
Do you want to start drawing but don’t know how to progress? You can achieve your objectives by combining simple, geometric shapes. Instead of drawing the whole subject at once, you can break it down into small chunks so that you can have an overall structure. Before you embark on your mission, it’s advisable to have a solid grasp of how to draw basic shapes such as a circle, cube, oval, square, rectangle, cylinder, ellipse, and sphere. Here is a list of things you need to have.
• 6B pencil or a compressed charcoal stick
• A large, rough-finish newsprint pad
• A kneaded eraser
Basic Geometric Shapes in Drawing
First, you need to have a picture of the object you want to draw. You can either start by drawing a cat, bird, dog, or flower. Once you’ve identified the object, the next thing you need to do is determine the basic shapes you need to draw to render the object. To make your work easier:
1. Locate the place where your picture will appear.
2. Make a top line, centerline, and bottom line.
3. Ensure you make a line whenever you change the shape.
A lot of information? Maybe it is better to try asking the professional, I have used this tutorial: Draw Like a Master Artist.

Freehand Circle
Drawing a perfect circle freehand can be challenging at first. Start by rotating your hand while keeping your wrist straight as you rotate your whole arm. Once you feel that your hand is flexible, you can slowly draw your circle on a large, rough-finish newsprint pad. You can even draw a couple of circles and choose the perfect one. Remember the best online class is available at Draw Like a Master Artist.
Drawing Rectangle without a Ruler
If you find it complicated to draw rectangular lines without a ruler, it’s advisable to draw smaller dotted lines and join them. Don’t give up if you don’t get it right at first because drawing is about practicing the movements and training your muscle and hand memory.
Symmetry
For you to draw a more accurate object, you need to create symmetry. For example, when drawing a flower vase, you might find it hard to match both sides. To make your work easier, draw a straight line in the center, and you will notice that the final product will be more accurate.
Important tip: Ensure your sketches are the same size as what you need for the final picture.
To avoid any mistakes in symmetry, try to draw the grid. Another professional tip like this can be found in the ultimate course for beginners and advanced artists. It makes learning faster and more fun!
Adding Dimension
After making the basic shapes, you can simplify your drawing by placing the object on the picture plane to have a more defined, accurate picture. After you’ve made all the adjustments, you’re supposed to eliminate the sketch lines you made by erasing or painting over them. Always ensure the sketch lines are lightly drawn to avoid leaving an ugly impression.
Combining Simple Geometric Shapes in Drawing
After drawing the basic shapes, you need to combine them to create a finished object. When combining, ensure you add the details you could have missed. Also, add the shading so that the drawing will be more defined. Follow these steps:
• Determine the object and the shape needed to render your preferred object.
• Draw all the basic shapes.
• Select the lines you want to include in your final drawing
• Lastly, combine them as you blend the forms so that you can have an accurate finish.
What to do when sketching a group
If you want to draw a group of objects, you can draw all the shapes fully. When sketching such groups, your objects should not necessarily fit on each other. There is even more about it, for details visit the complete course.

Overlapping objects
To draw overlapping objects, you need to extend the sketches in that the final picture will appear as if some objects are in front while others will appear further back. Ensure you don’t overlap too much to avoid damaging your final picture.
Shading your Geometric Shapes in Drawing
After making your sketches, you need to finish your final picture by shading it. You can get rid of the sketch lines by adding layers of graphite when shading. Your sketches outline should not be too dark because the final product will be too dark and even look unrealistic after shading. Remember that natural objects have edges, and you need to shade your object until everything blends perfectly.
Before you embark on your drawing journey, it’s crucial to understand the essential elements of art. The most basic element is learning how to draw shapes. You can start by making small shapes and then make bigger ones as you perfect the art. Remember to shade your pictures so that they can look realistic and have a natural blend. Advanced tips like in the picture below are mentioned in Draw Like a Master Artist.

NEXT STEP:
Are you stuck with a particular approach? It’s time to take action and start experimenting to see some improvement. It may feel a bit strange at first, but with a touch of practice, you’ll start seeing the benefits of using techniques in your drawings. Visit complete course in Draw Like a Master Artist.
Now when you have learned about the geometric shapes in the drawing, you can move to the next important step and learn:
Thanks to Patrick Connors & Thomas Schaller for helping with the tutorials.
Title Image, (Image credit: Анна)
Disclaimer, this page contains affiliate/sponsored links.

